Tuesday, December 2, 2014

Getting My December Daily Challenge ON!

Hey again, Peeps. Whew! The holidays sure are ramping up, but I'm excited to participate in the December Daily because it keeps me focused on what is REALLY important- spending time in the Craft Room!!!

So, here are my first two pages. The first one was a white on white "suggestion". Since I love white on white, it wasn't a problem at all.

It's always hard for me to start a new journal. I have to get over several things:
1. That it has to be perfect.
2. That there has to be a cohesive theme.
3. That it has to be perfect.

So, with this journal, I'm embracing imperfection. I have several things I want to journal about, and if one doesn't jive with the other, that's OK. This is my PLAY time.

I've gone through some revelations lately, so I'm going to include them this month. I've had to re-define some boundaries concerning some relationships, so I'm going to write about that, as well as celebrating every-day life. I'm also including some materials from this month's Brave Girls Club Soul School, which is a fabulous course. So. Many. Good. Things.

So, in keeping with my new-found love of hand-carved stamps (see blog post here), I wanted to have a lined area for my journaling, so I made a stamp.


So, here is my first page in the journal. Pretty self-explanatory.


Ha! I did end up covering up some mistakes. Kinda ironic.


I often over-think my work. I think it's because since I'm in the business of designing and selling my crafts, that I think everything has to be perfect (like I endeavor to do for my customers). However, sometimes I need to just sit back and have fun.


And here's the page for Dec. 2. I included some interactive journaling cards that open up. This might become a trend.


Here are the cards.


And inside, I wrote about places where I'm peaceful.


Card 2


And inside, how I can seek peace:


And, here is the layout. I've never really liked my handwriting, but it's all a part of who I am, so I'm going to write more instead of relying on a cute font from my printer.


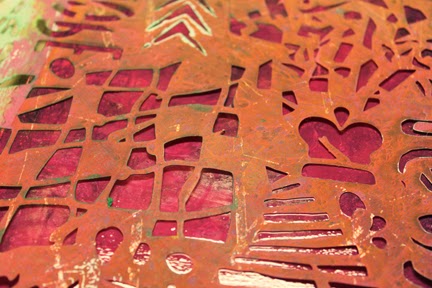
Of course, I had to do a little painting and doodling.


And I included the cute pin that came with my Brave Girls Soul School subscription.


And, I even sat at the sewing machine, which isn't my fave thing to do, but I love the effect. A few pearl embellies later, and I was done. I do have to remember to punch my holes in my pages before I start adding junque, so that I don't cover over those areas. After all, it DOES need to be somewhat functional and put together, not unlike me.


Thanks for looking! Stay tuned for the next few days' layouts!
Fondly, Tami


Sunday, November 23, 2014

Join Me in the December Daily Journal Challenge!

Hey, Peeps! It's been a while. 
I've discovered since my Dr. has helped me with my chronic pain, I've been on the GO! I've loved it, but I've also discovered that I'm on my computer less and less. I think that's a good thing!

Anyway, I wanted to let you know that I'm participating in a December Daily challenge, making a book to journal during December. Sue Hiles is heading it up, and she's a hoot. Her YouTube channel can be found here, and the challenge is open to anyone that wants to join. You can join the Facebook group here. Sue is a great leader, and the challenge is reasonable and fun. It has already caused me to spend more time creating in my craft room, so that's a good thing!

I thought I'd share the beginnings of my journal with you. I started with an old book that I slaughtered. I took the covers off, covered them with gesso, and then decorated the front (the back will be done later). 

Here's the gesso covered cover. Wooooo.


I stamped a dried tea bag with one of my hand-carved stamps, some of which are available in my Etsy shop here.


I decoupaged a hymnal carol, an old post card, and the stamped tea bag. Then, I spattered it with metallic silver alcohol ink and added some rubons.


Add a stamp of bubble wrap covered with gesso...


...and using my hand-carved snowflake stamp (stay tuned for a blog post about how to turn your stencils into stamps)...


 I embossed some snowflakes. I didn't want that much "chatter" (the lines that you see on a hand-carved stamp), so I rubbed some of the powder away before I heat embossed it.


Before the cover got too "junked up", I punched two holes to put my binder rings through. I just eyeballed it.


Then I layered lots of "stuff". I had some fabric remnants, so I ran them through my Big Shot using a steel rule poinsettia dye.


A close-up of the "stuff". 


Embossed snowflake and some burlap.


Of course, I need the date.


Doodles.


And, today, Sue issued a "flash challenge". We had 24 hours to make a tag. I decided to make a tag from a Coldwater Creek (may it rest in peace) tag from an article of clothing. I covered it with gesso.


I decided to emboss "to the world" from my Joy to the World Tag Stencil


I masked off the area I didn't want to include with paper tape.


I inked the area up using the embossing resist reinker and then I embossed it with aged ochre embossing enamel.


A little stamping, some embellies, and a bow later, it's a cute little tag that I will use later in the book. The words turned out a little gloppy (because I was a little "generous" with the embossing reinker), but I liked the look.


Stay tuned for the next December Daily challenge.
Thanks again for checking this out! 
Fondly, Tami


Tuesday, October 28, 2014

We Have a Stencil Winner!


Hey, Peeps. Thanks so much for your lovely comments during the Gelli® Blog Hop! HubbyDoc picked the winner last night, and it was comment #6, which is Alison! Woot, woot! Stay tuned for future giveaways, because I LOVE sharing my stencils!

And, I have a few prints to share with you. Loving me some medallion stencils, which are available in my Etsy shop here.

This print was made with my Dandelion medallion.


Here, I used my Lacy Medallion


Three Wonky Trees, perfect for Christmas.


And again, thanks for looking! Fondly, Tami

Wednesday, October 22, 2014

Gelli® Blog Hop and Stencil Giveaway!


Hey, Peeps. I'm so excited to be a part of this wonderful Gelli® Print Blog Hop. Thanks to Michelle Reynolds for the thought and execution! You rock!

So, I was trying to think of what I could do that hasn't been done. I actually did a different project- more of a mixed media assemblage- but I wasn't quite sure what I wanted to do. So, being the true artist that I am, I abandoned that project half-way through and started something else. NO JUDGING!!!

And, I did have some forethought, so I started out with a lovely, sturdy mixed media paper. This is probably my fave to work with. 


I wanted to play with something different. This is some inexpensive gouache. 


A little dab'll do ya.


Gouache spreads differently on the plate than acrylic. I used a brayer, just as you use with acrylic paint.


As you can see, it leaves a much different, non-uniform look compared to acrylic paint. I kinda like it.


I also painted some yellow circles with gouache. I forgot to take an after pic of the print, but you'll see it later. 


I also spread some red on with a credit card, just to see how it spread differently.


Here, I used my Sticked Hearts stencil.


You can see the yellow circles layered on the grey here.


I put the wet, red stencil on my waste paper and wiped it through the stencil with a baby wipe.


Here's the result. Like many Gelli® prints, the "waste" or "ghost" prints are often the most interesting.


I decided to re-position my heart stencil, and outline with my Stabilo black pencil, just for a different look. 


I tried to smear the pencil (which is water soluble) with my water brush, but I had forgotten that I hadn't prepared my surface with gesso, which would have made the stabilo pencil mark smear better. Oh, well. I just discovered another technique, aka mistake.


Then I switched to acrylic paint for no particular reason.


Here, I used my Iron Gate stencil.


I stamped through the stencil before I printed. This works more effectively with an "open" stencil (aka not detailed), and with a darker paint than I used. I'M NOT PERFECT, PEEPS!


Here's the ghost leftovers on the plate.


And then I moved on to grey and yellow- my two new fave colors.


I printed using my Crowned Stencil.


And here's the print.


And the ghost print.


Next, I used my Faith Stencil. This is one of my faves since there's so much texture going on.


And, the print.


And, you always need to add a few hand-carved stamps. If you want to know more about making these, you can check my blog post here and my Pinterest board here.


Don't forget that for a different look, you can roll your stamps instead of just pressing them.


And then, there's nothing like a little splattering. I like using my fan brush with some watered down paint.


And, here's a print with some splatters.


And, there's nothing like some good ol' fashioned stenciling. Here, I used my Grunge number tag stencil and some blue paint for a little punch...


...and my Scruffy Crosses tag stencil.


Just some doodling with a NeocolorII crayon (water soluble)


And I think I'm ready to move on to the book.
You know these wonderful little coffee cup thingies? Well, they're going to become a cute little book.


I loved this particular one because of the dimpled texture. I tore it apart at the ends (it was conveniently serrated for me already). Then I applied gesso to the front and back of each piece.


I dried the gesso, watered down some paint, and brushed it on each side.


I wiped off some of the paint with a baby wipe, then I traced one side on the backs of my prints.


I cut out the shapes, slightly smaller than the coffee cozy.


Here are some "pages".


I eyeballed where I wanted my rings to be to bind the book.


Then I punched holes and inserted eyelets with my Cropodile. I did this just to the front and back pieces.


To emphasize the texture, I brushed on a little distress paint.


Since the backs of each page were white, I just applied some distress stain. I didn't want to have both sides of each page Gelli® printed because I wanted to leave room for journal entries or writing.


And, here are some of the spreads.


Of course, I had to junk the cover up a little, so I added a flower, some vintage buttons and beads, some pearl accents, and some burlap.


And, a little ribbon and a few more strung out beads.


And here's the final book.


And, just when you thought you've had all the fun you could have, there's more!
Just for visiting my blog, I am giving away THREE of the following 6" stencils from my Etsy shop


All you need to do is leave a comment about what you like about this tutorial or about the Gelli® Plate. 
On Oct. 26 at 8PM (EST), I will yell into the other room, "HONEY! PICK A NUMBER BETWEEN _ AND _, and he will pick the winner. Yups, that's how I roll.

And, if you like my stencil designs, feel free to check out LOTS more in my Etsy shop here.

I hope you enjoyed this picture laden tutorial. Thanks for looking. And, if you haven't checked out all of the other blogs, I have them listed below. Happy printing!


Wednesday 15th Oct Michelle Reynolds http://shellsinthebush.blogspot.com.au/Thursday 16th Oct Joanna Grant http://joannabananadesignoriginals.blogspot.comFriday 17th Oct Jacques Williamos http://theelevatorpress.wordpress.com/Saturday 18th Oct Linda Stokes http://www.lindastokes-textileartist.com/Sunday 19th Oct Phillippa Montier http://pipart71.weebly.comMonday 20th Oct Lauri Crowe http://www.laurijeancrowe.comTuesday 21st Oct Gail Schmidt http://www.shabbycottagestudio.netWednesday 22nd Oct Tami Sturm Howse http://www.thisandthatfromtami.blogspot.com