Monday, October 28, 2013

Peeled Gesso

So, you know how when you discover mixed media, and then you never throw anything out?
And, if you do think about throwing anything out, you think twice.
And then, you don't throw it out?
And then, you discover a new technique because you're hoarding?
Yups. That happened to me today.
I was minding my own business in my Craft Room as I was using gesso on my non-stick craft sheet.
As I went to scrape the dried and partially dried gesso off, I thought, "Hey. This would be cool if I could use it."
So, I did.

As you can see, my "non-stick craft sheet", aka Teflon oven liner, was covered with gesso.


I made sure it was completely dry. Some of the thicker areas needed to be coaxed with my heat gun.


Then, I decided to color it with some Distress Paints and Distress Stain. 


I played with a little color mixing as well. Distress Paints are permanent when they're dry, so I made sure to mix them while wet.


I wanted to keep my peeling colors separated, so I ran my credit card on the sheet to divide them.


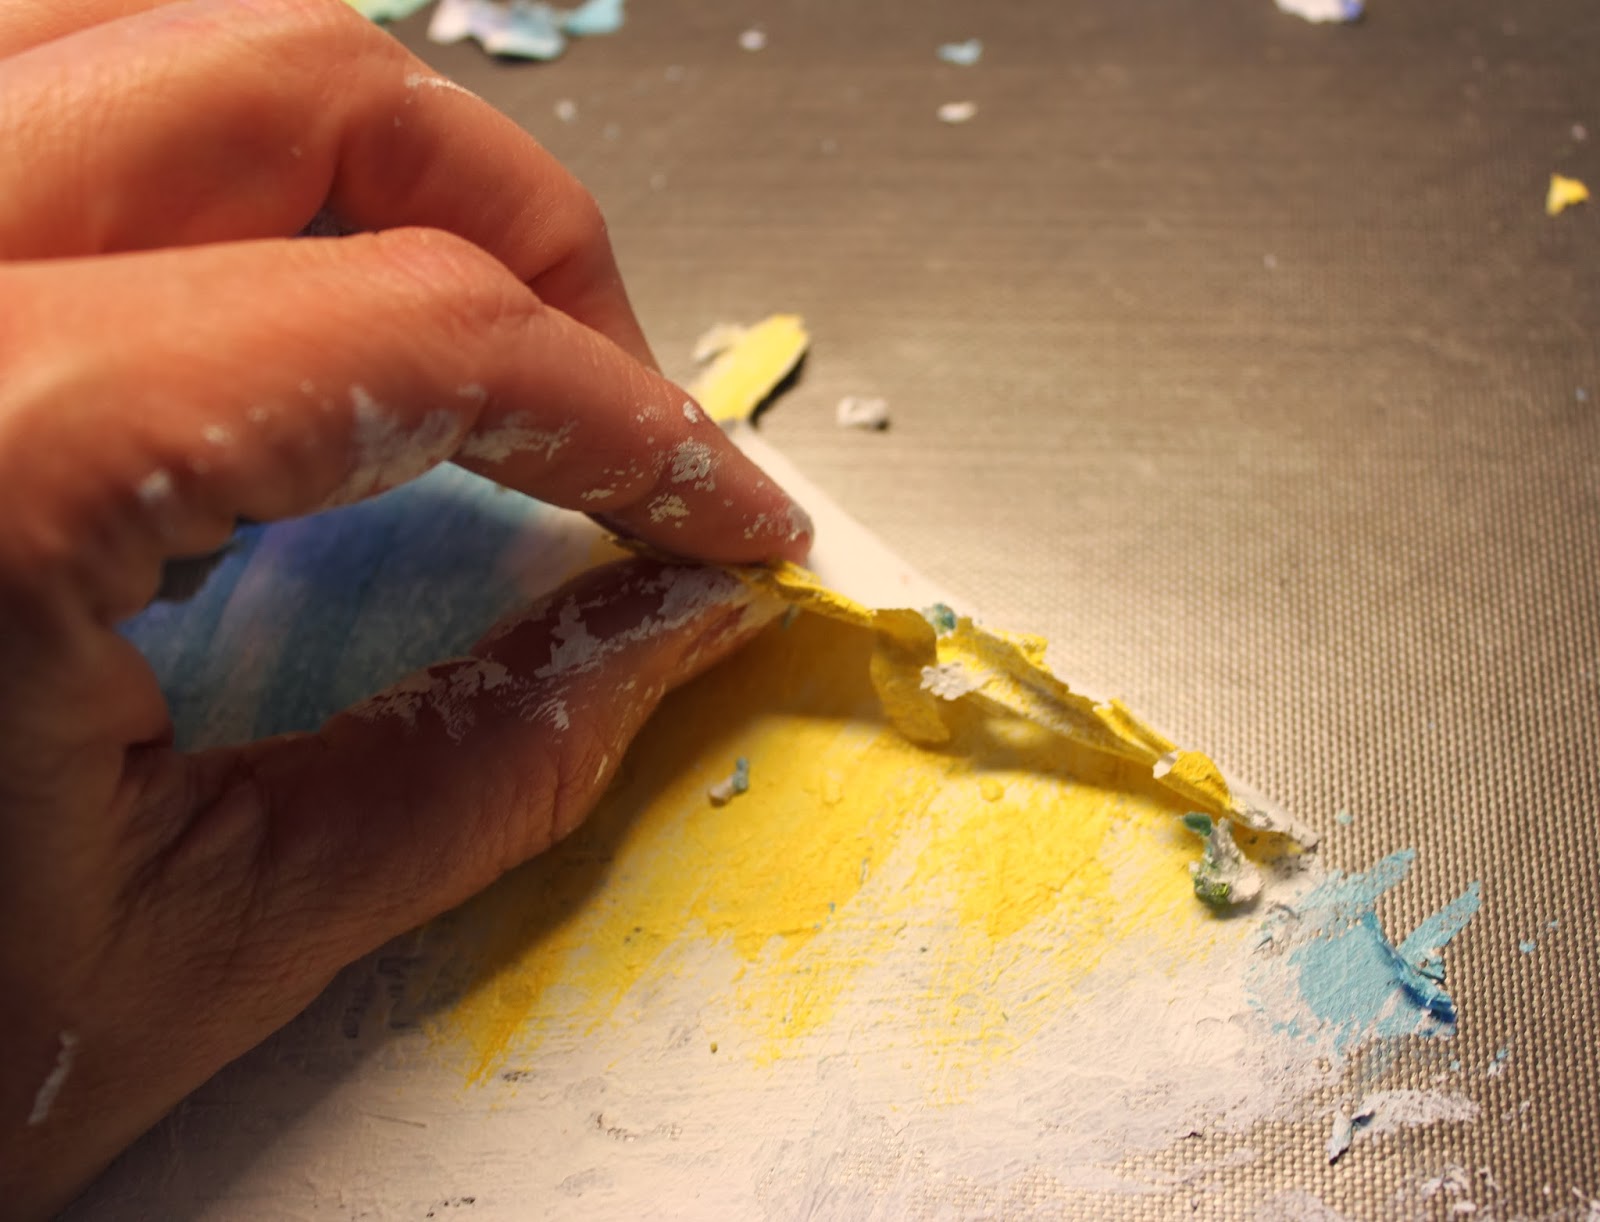
I scraped the gesso by pulling away at the edge. This way, it kept the peelings small.


Then, I pulled the thick parts up in sheets.


Here it is decopaged onto a book page which I will be using in a junk journal.


Close-up


Then I thought, "Why not stamp it before I pull it up?"
So, I did. 
This was stamped with Staz-On, because I knew I'd be using Mod Podge to adhere it to the book page, so the ink had to be permanent as well, otherwise it would smear.


Here's some blue and white stamped with dots.


Some more peelings.


Blue dots, decoupaged to another book page.


The texture and color variations are fun.


Tone on tone-ish.


And, here is my baggie of peelings, ready for another project.


Of course, I had to experiment with some more stamps. Here's my favorite crackle stamp.


I'll be sure to post more pics when I finish my journals. 
Thanks for reading!
Fondly, Tami

Friday, October 25, 2013

New Handmade Christmas Cards

So, I've been quite busy in the Craft Room. I have a blast making cards, but boy, do I ever OBSESS over them! Every card has to be perfect!
Yesterday and today, I made some Christmas cards.

"Making a List", made with a hand painted canvas flower with a Christmas jingle bell, grungeboard with white crackle paint, vintage buttons, lace, and ribbon.


Close-up of buttons.


"Merry and Bright", also made with vintage lace, buttons, canvas flower, and some brads.


"Peace on Earth", with a cute vintage rhinestone button punctuating the canvas flower.


And, a "Very Merry", also made with vintage buttons, a bead pick, and pearl accents.


Thanks for looking!
And, they are available in my Etsy shop if you're interested in handing out some beautiful handmade cards this season.
Fondly, Tami
I'm linking to:
Saavy Southern Style


Sunday, October 20, 2013

Applying Vinyl Wall Words

Hey, Peeps. I'm here today to answer that age-old question, "How do I apply my vinyl decorations to my walls?"
Vinyl is so hot in the home decor market right now. I LOVE decorating with vinyl because it looks like you've painstakingly painted it on your walls (or mirrors...or furniture...or doors...etc.). The other very cool thing is that when you get tired of it, you just peel it off. It's generally inexpensive, so you get a lot of bang for your buck.

Here's how to get started.
My vinyl comes with transfer tape already applied. When you receive it, take a firm card like a credit card. Here, I used my Pampered Chef scraper. Scrape from the center out. You don't want your transfer tape to bunch up and scrape your lettering or design.


Carefully and slowly, lay the design on a flat surface and pull the transfer tape off of the front. 


Keep the design flat and SLOWLY peel.


Line up your center marks on your wall. I often just put a little pencil dot on the wall, top and bottom (so it's straight) where I want my center to be. 


Press the top and bottom in the center, making sure that they're lined up correctly. At this point, you don't want to press your design on your wall. If it's not lined up, lift up the bottom of the transfer tape and re-apply it.


Check to make sure it's straight (did I make my point?).


Now it's time to smooth it out gently on your wall. Use the scraper to gently press the top of the transfer tape.


Pull the transfer tape gently at a sharp angle. If the design sticks to the tape, roll the tape back onto the design, burnish gently on the wall, and start pulling the tape off again.


 Keep pulling slowly. You don't want to rush the process.


Keep pulling at an angle, resisting the urge to speed up the process.


See these little registration triangles? They really aren't a part of the design. Go ahead and peel them off. 


And, voila! You're left with a beautiful design that looks hand-painted. And, when you get tired of it, just peel it off of your wall. 


Please note that wall words and vinyl designs should only be used on cured surfaces, so if you've recently painted (within the last month), don't apply them until you know your walls can take it. I have vinyl all over my house, and I love it. 
And, if you like this design, you can find it in my Etsy shop. I can also do custom orders!
Fondly, Tami

Friday, October 18, 2013

My Junky Living Room

The other day, I realized that none of my tables in my living room match each other. But, I also realized that I LOVE my living room. Now don't get me wrong, there are things I still want to change, but having a second daughter in college kinda cramps the spending style, ya know what I mean?
I think one of the things I really like is that my room breaks from tradition-
1. The couch- I have a loveseat.
2. The fireplace- it's covered up with the loveseat.
3. The tables- none of them match.
4. The upholstery- my yellow chairs are old and they're fairly dirty. I need to clean them.
5. The carpet- the fact that I have carpet is old school, but alas, I can't afford new flooring right now, either.
6. The paint- it's semi-gloss. Yups. I LOVE semi-gloss on my walls. The friend who painted for me questioned my choice, but I wouldn't budge. I really like the sheen and how it reflects the light. And, don't EVEN talk to me about flat paint. ICK!
Here is the view of my living room when you walk in from the foy-A, as the fancy people say.
If I could paint that dark hole of a piano, I would, but HubbyDoc has put his foot down about that, although, I did think to put a piece of foam board on the flat part of the front where the music sits. But, that will be another project for later. 


My originally designed coffee table, which I have grown to love more and more. It was originally a $25 unfinished piece, procured off of Craigslist. The butter bowl and paddle were my Grandma's, and I bought the balls at Burlington Coat Factory for cheap (I think about $20). The glittered pumpkins were old, plastic orange ones that I changed up.


This is my newly designed mantle. The wreath was made by Moi, and I mounted it on a fake vent cover that I salvaged from my house when it was re-sided. When I told the construction guy I wanted it, he looked at me weirdly, but boy, would he be envious if he saw it now!
See how I made this wreath here.
The orange press on the right of the wreath was a very interesting find at a yard sale for about $2. I felt like that was a major score, not so much because I thought it was valuable, but because I thought it gave some visual interest- color and texture.


Another view.

I procured the end tables from Craigslist again. My 76 yr. old mother went with me (never go alone), and she carried a ball-peen hammer with her, just in case she needed to fend off a Craigslist killer. The trip was uneventful, except that I bought these very sturdy beauties for only $60. I found some paisley designs online, and I used them for a very cool painted finish. 


Lamps were from Homegoods for about $40 a piece or so. I'm tempted to put some burlap flowers on the shades, but I'll hold off.


My giant alliums were dried and sprayed metallic silver. They're a little wonky in their galvanized bucket that was about $3 or so at a yard sale. I'll fix them later. The table in the corner is holding my Celtic harp (no, I haven't played in a while), and I'm surprised that the table has lasted as long as it has without paint, but its days are numbered.


I love little vignettes. The little iron was my Grandmother's toy iron, and I just saw one like it on Etsy, dated the late 1800's. I used a tissue tape transfer on the candle, which is battery operated. I like a combo of battery ones (I don't have to worry about them torching up my dried flower arrangements), and real flames.


More glittered pumpkins. This vignette sits atop a counterpane panel that HubbyDoc knit. Yups. He's pretty amazing.


My little telephone table, which I painted with lots of places and events from my current town. This is one of my favorite projects, but I do say that about most of them. 
The lamp was $22. The base was $5, and I bought the frilly lampshade from TJMaxx for $17.


My gourds, which were $1 a piece at a yard sale, in my berry basket, which was just a few bucks.


And, a close-up of my alliums.


I think I love my living room also because I feel like I robbed the bank. 
I love decorating from yard sale finds, but I would make a BIG suggestion. Please, please, please be careful when you're buying used upholstered furniture.
We have friends who "contracted" bedbugs. They spent a few thousand dollars to get rid of them, so I would suggest not even taking the chance. It's not worth it.
So, I hope you enjoyed the tour of my living room.