
Hey, Froggers! (friends who are bloggers) So, I got contacts again, except that now that I'm older (don't tell anyone), it's a lot more complicated. I tried bifocal contacts, but I couldn't STAND them, in spite of the fact that I have a good friend who popped hers in, loved them, and never looked back (well, I suppose she really DID look back, since now she had new contacts that worked and was probably thrilled). I'm now wearing monovision contacts, which is an oxymoron, since one of them is bifocal and one is for long-distance sight. I'm still getting used to them, and as a matter of fact, I'm squinting at this very moment.
Diversion...(most people call it multitasking, but I think it's just really ADD), I'm watching a very real commercial right now about Pajama Jeans. Seriously, it looks like an SNL skit. I'm waiting for Tina Fey to show up on the screen. It's truly ridiculous.
So, I was trying to take a picture of my new craft with my brand new *not-cheap* camera. I tried and tried to get it focused, and it wouldn't work. I got quite frustrated when I realized that I was looking through the viewfinder with my bifocal eye. When I switched looking through it with my distance eye, it was miraculously clear. So, I guess I'm going to have to change my old ways.
Anyway, I think I'm nesting again. You see, Youngest is leaving for college in the fall (she's such a sweetie). She's currently homeschooled, but she's approaching the end of her senior year and has so much on her transcript, she doesn't have much that she needs to do. She's currently taking 2 college courses, and when she graduates from high school, she will have 27 college credits. So, I don't need to do a "lot" with her concerning school since she's a smarty-pants and can plan her classes on her own. So, after MANY years of homeschooling, I finally have a little bit more time, thus the Crafting Frenzy.
A few days ago, I saw something in a mag., and as usual, I thought, "I can make that", so I did. I have many types of dried flowers in my basement, so I tapped into my reservoir. I use a variety of methods to dry my flowers, and one of my fave methods is drying them in a desiccant (yes, I had to look up that spelling) called Silicagel, although there are several different types out there (and NEVER buy it at AC Moore or Michael's without a coupon). Here's my newest project:
 These are my delicate little Japanese Dogwood flowers, although my Oldest (who's a smarty-pants college student) tells me that these white "flowers" are actually leaves. I so rely on her to be botanically correct. These "leaves" were dried in Silicagel. You must cut or pick them when they've only "bloomed" for a day or two. You lay down a nice thick layer of the sandy substance in your container, then you lay these pretties right side up. Once they're placed, with edges NOT touching, you carefully sprinkle more desiccant on top, covering them completely. Seal the container (I usually use Rubbermaid) and don't peek for a few weeks. After you have waited patiently (I put the date that I can peek on the calendar which gives me something to look forward to), you carefully open your container, tilt it slightly, and expose your "flowers". They will be dry (after all, that's the point), so be careful.
  These blooms are at least 6 years old. I dried many when I HAD a J. Dogwood (I have one now, but it's a baby and isn't producing for me yet). I often use them on my Christmas tree or my stairway garland. They are just so pretty.
  I just realized that this blog post has become l...o...n...g. So, without further delay, I wanted you to see my round key svg file.
*This file is no longer available for free. To purchase, go to www.diecutdesigner.com after April 23, 2011. Thanks. Tami
I hope you enjoy my creations. I really do aspire to encourage!
It's time to go take these *&^%$#@ contacts out! Fondly, Tami
Diversion...(most people call it multitasking, but I think it's just really ADD), I'm watching a very real commercial right now about Pajama Jeans. Seriously, it looks like an SNL skit. I'm waiting for Tina Fey to show up on the screen. It's truly ridiculous.
So, I was trying to take a picture of my new craft with my brand new *not-cheap* camera. I tried and tried to get it focused, and it wouldn't work. I got quite frustrated when I realized that I was looking through the viewfinder with my bifocal eye. When I switched looking through it with my distance eye, it was miraculously clear. So, I guess I'm going to have to change my old ways.
Anyway, I think I'm nesting again. You see, Youngest is leaving for college in the fall (she's such a sweetie). She's currently homeschooled, but she's approaching the end of her senior year and has so much on her transcript, she doesn't have much that she needs to do. She's currently taking 2 college courses, and when she graduates from high school, she will have 27 college credits. So, I don't need to do a "lot" with her concerning school since she's a smarty-pants and can plan her classes on her own. So, after MANY years of homeschooling, I finally have a little bit more time, thus the Crafting Frenzy.
A few days ago, I saw something in a mag., and as usual, I thought, "I can make that", so I did. I have many types of dried flowers in my basement, so I tapped into my reservoir. I use a variety of methods to dry my flowers, and one of my fave methods is drying them in a desiccant (yes, I had to look up that spelling) called Silicagel, although there are several different types out there (and NEVER buy it at AC Moore or Michael's without a coupon). Here's my newest project:

 These are my delicate little Japanese Dogwood flowers, although my Oldest (who's a smarty-pants college student) tells me that these white "flowers" are actually leaves. I so rely on her to be botanically correct. These "leaves" were dried in Silicagel. You must cut or pick them when they've only "bloomed" for a day or two. You lay down a nice thick layer of the sandy substance in your container, then you lay these pretties right side up. Once they're placed, with edges NOT touching, you carefully sprinkle more desiccant on top, covering them completely. Seal the container (I usually use Rubbermaid) and don't peek for a few weeks. After you have waited patiently (I put the date that I can peek on the calendar which gives me something to look forward to), you carefully open your container, tilt it slightly, and expose your "flowers". They will be dry (after all, that's the point), so be careful.
  These blooms are at least 6 years old. I dried many when I HAD a J. Dogwood (I have one now, but it's a baby and isn't producing for me yet). I often use them on my Christmas tree or my stairway garland. They are just so pretty.
 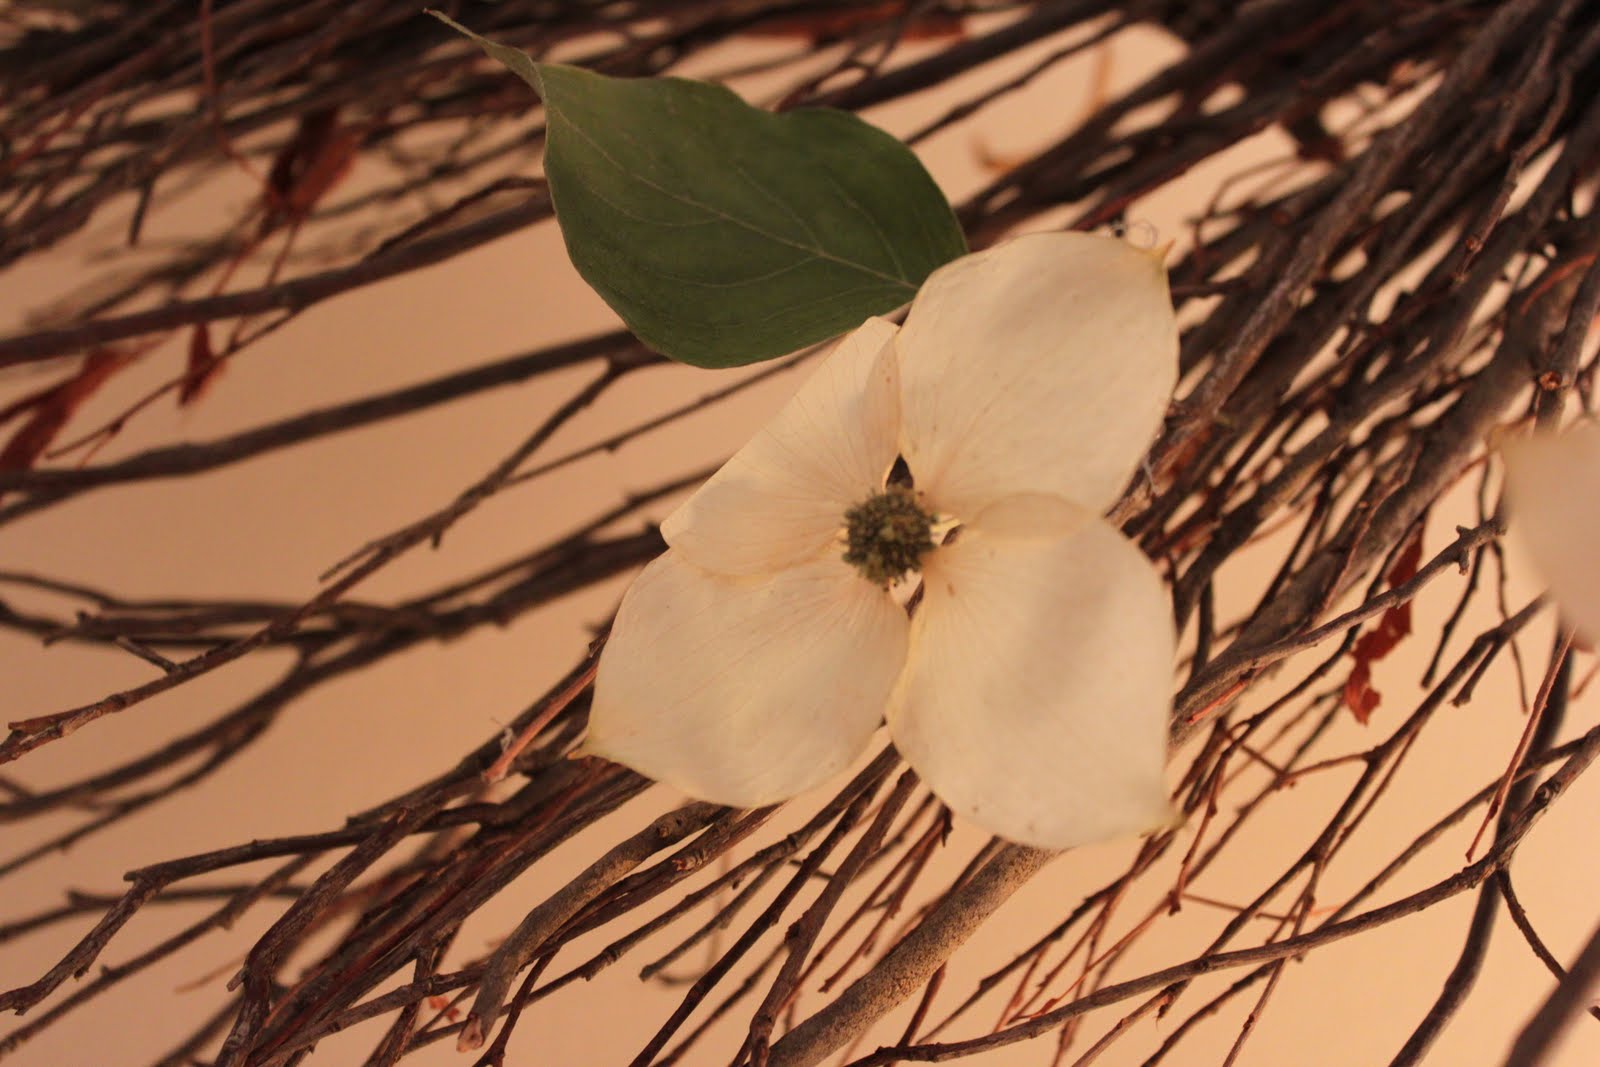 I just realized that this blog post has become l...o...n...g. So, without further delay, I wanted you to see my round key svg file.
*This file is no longer available for free. To purchase, go to www.diecutdesigner.com after April 23, 2011. Thanks. Tami
I hope you enjoy my creations. I really do aspire to encourage!
It's time to go take these *&^%$#@ contacts out! Fondly, Tami

 I am so thrilled with how it turned out. I did, however, have an acrylic paint emergency. You know- the time when you have a few minutes to paint and you discover that you don't have black acrylic paint? How can that possibly happen? It's like discovering that you've run out of milk or toilet paper, which I can't imagine happening in this house. Well, thanks to my neighbor, Krafty Kim, I was supplied with an emergency ration to complete the job. For those of you who've never done anything like this before, it is easy-peasy! You pick a font you like on your 'puter, blow it up to the appropriate size, tape it to the inside of your shade, use a small paint brush and acrylic paint, and voila! I think it adds so much charm to this little lamp.
  You unmount the rubber. Keep the sticky stuff on it. That will help with mounting your paper.

