Hey, Peeps. I'm so excited to be a part of this wonderful Gelli® Print Blog Hop. Thanks to Michelle Reynolds for the thought and execution! You rock!
So, I was trying to think of what I could do that hasn't been done. I actually did a different project- more of a mixed media assemblage- but I wasn't quite sure what I wanted to do. So, being the true artist that I am, I abandoned that project half-way through and started something else. NO JUDGING!!!
And, I did have some forethought, so I started out with a lovely, sturdy mixed media paper. This is probably my fave to work with.
I wanted to play with something different. This is some inexpensive gouache.
A little dab'll do ya.
Gouache spreads differently on the plate than acrylic. I used a brayer, just as you use with acrylic paint.
As you can see, it leaves a much different, non-uniform look compared to acrylic paint. I kinda like it.
I also painted some yellow circles with gouache. I forgot to take an after pic of the print, but you'll see it later.
I also spread some red on with a credit card, just to see how it spread differently.
You can see the yellow circles layered on the grey here.
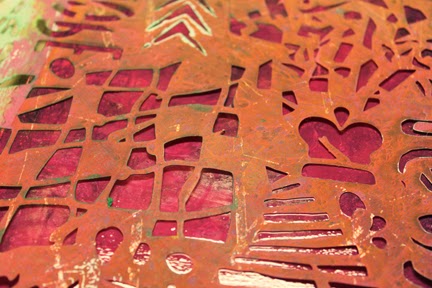
I put the wet, red stencil on my waste paper and wiped it through the stencil with a baby wipe.
Here's the result. Like many Gelli® prints, the "waste" or "ghost" prints are often the most interesting.
I decided to re-position my heart stencil, and outline with my Stabilo black pencil, just for a different look.
I tried to smear the pencil (which is water soluble) with my water brush, but I had forgotten that I hadn't prepared my surface with gesso, which would have made the stabilo pencil mark smear better. Oh, well. I just discovered another technique, aka mistake.
Then I switched to acrylic paint for no particular reason.
I stamped through the stencil before I printed. This works more effectively with an "open" stencil (aka not detailed), and with a darker paint than I used. I'M NOT PERFECT, PEEPS!
Here's the ghost leftovers on the plate.
And then I moved on to grey and yellow- my two new fave colors.
And here's the print.
And the ghost print.
Next, I used my Faith Stencil. This is one of my faves since there's so much texture going on.
And, the print.
And, you always need to add a few hand-carved stamps. If you want to know more about making these, you can check my blog post here and my Pinterest board here.
Don't forget that for a different look, you can roll your stamps instead of just pressing them.
And then, there's nothing like a little splattering. I like using my fan brush with some watered down paint.
And, here's a print with some splatters.
And, there's nothing like some good ol' fashioned stenciling. Here, I used my Grunge number tag stencil and some blue paint for a little punch...
Just some doodling with a NeocolorII crayon (water soluble)
And I think I'm ready to move on to the book.
You know these wonderful little coffee cup thingies? Well, they're going to become a cute little book.
I loved this particular one because of the dimpled texture. I tore it apart at the ends (it was conveniently serrated for me already). Then I applied gesso to the front and back of each piece.
I dried the gesso, watered down some paint, and brushed it on each side.
I wiped off some of the paint with a baby wipe, then I traced one side on the backs of my prints.
I cut out the shapes, slightly smaller than the coffee cozy.
Here are some "pages".
I eyeballed where I wanted my rings to be to bind the book.
Then I punched holes and inserted eyelets with my Cropodile. I did this just to the front and back pieces.
To emphasize the texture, I brushed on a little distress paint.
Since the backs of each page were white, I just applied some distress stain. I didn't want to have both sides of each page Gelli® printed because I wanted to leave room for journal entries or writing.
And, here are some of the spreads.
Of course, I had to junk the cover up a little, so I added a flower, some vintage buttons and beads, some pearl accents, and some burlap.
And, a little ribbon and a few more strung out beads.
And here's the final book.
And, just when you thought you've had all the fun you could have, there's more!
Just for visiting my blog, I am giving away THREE of the following 6" stencils from my Etsy shop.
All you need to do is leave a comment about what you like about this tutorial or about the Gelli® Plate.
On Oct. 26 at 8PM (EST), I will yell into the other room, "HONEY! PICK A NUMBER BETWEEN _ AND _, and he will pick the winner. Yups, that's how I roll.
And, if you like my stencil designs, feel free to check out LOTS more in my Etsy shop here.
I hope you enjoyed this picture laden tutorial. Thanks for looking. And, if you haven't checked out all of the other blogs, I have them listed below. Happy printing!