Wednesday, November 6, 2013

Custom Junk Journals

I've been having a great time making more junk journals. I received a custom order for three, and I love making them interesting and different. Here they are. 

Journal 1

Journal 2

Journal 3

Vintage flowers and burlap

Lace Bows

More flowers, vintage buttons, and beads.


A diagonal approach.

Crinkle ribbon and a strong focal point.
Clasps from a sweater.


Each page has something special. 

Tag with a grungy heart.

Tag close-up with clear embossing powder.

Tag with gouache, Pan Pastels, and India ink.

Different tag.
Another tag with embossing.
Hand Painting with Doodling.


Vintage Bead Adornments.

Clear Embossing.

Chevron crackle paint
I used my for the above chevron with my Chevron Tag Stencil (available in my Etsy shop).

A grungy, sparkly star with burlap.


A chipboard key and crinkle ribbon.

Stamped dots.

Glass bead gel, using my Stretched Tag Stencil.

An inspired word from my Funky Words Stencil.


And as always, a key.


And vinage lace.

Again, using my Funky Words Stencil and some paint.


And molding paste with Viva Decor silver paste, using my Laced Birds Stencil.


More vintage beads and lace.


Perfect Pearls with stamps.


And more Perfect Pearls with stamps and paint.


Pan Pastels over canvas, with a little bit of doodling.


And, peeled gesso, using my peeled gesso technique.


And more peeled gesso with some washi tape.


Basic stamping.


And more basic stamping. I love this particular alphabet stamp.


And, you gotta love some Stickles.


More Washi tape.


And, some more stamped, peeled gesso.


And, I couldn't resist another vignette picture using my Grandmother's toy sewing machine. If there was a fire in my house, and I had time to grab something (and we all know you shouldn't take ANY time to grab anything), assuming my hubby and dog were already out of the house, I'd grab this.


And, if you like what you see, and I'm sold out in my Etsy shop, feel free to convo me for a custom order.
Thanks again for looking! Fondly, Tami

Today, I'm linking to Jennifer Rizzo.
Coastal Charm
My Uncommon Slice of Suburbia
From Dream to Reality
DIY By Design
Wow Us Wednesday

Monday, October 28, 2013

Peeled Gesso

So, you know how when you discover mixed media, and then you never throw anything out?
And, if you do think about throwing anything out, you think twice.
And then, you don't throw it out?
And then, you discover a new technique because you're hoarding?
Yups. That happened to me today.
I was minding my own business in my Craft Room as I was using gesso on my non-stick craft sheet.
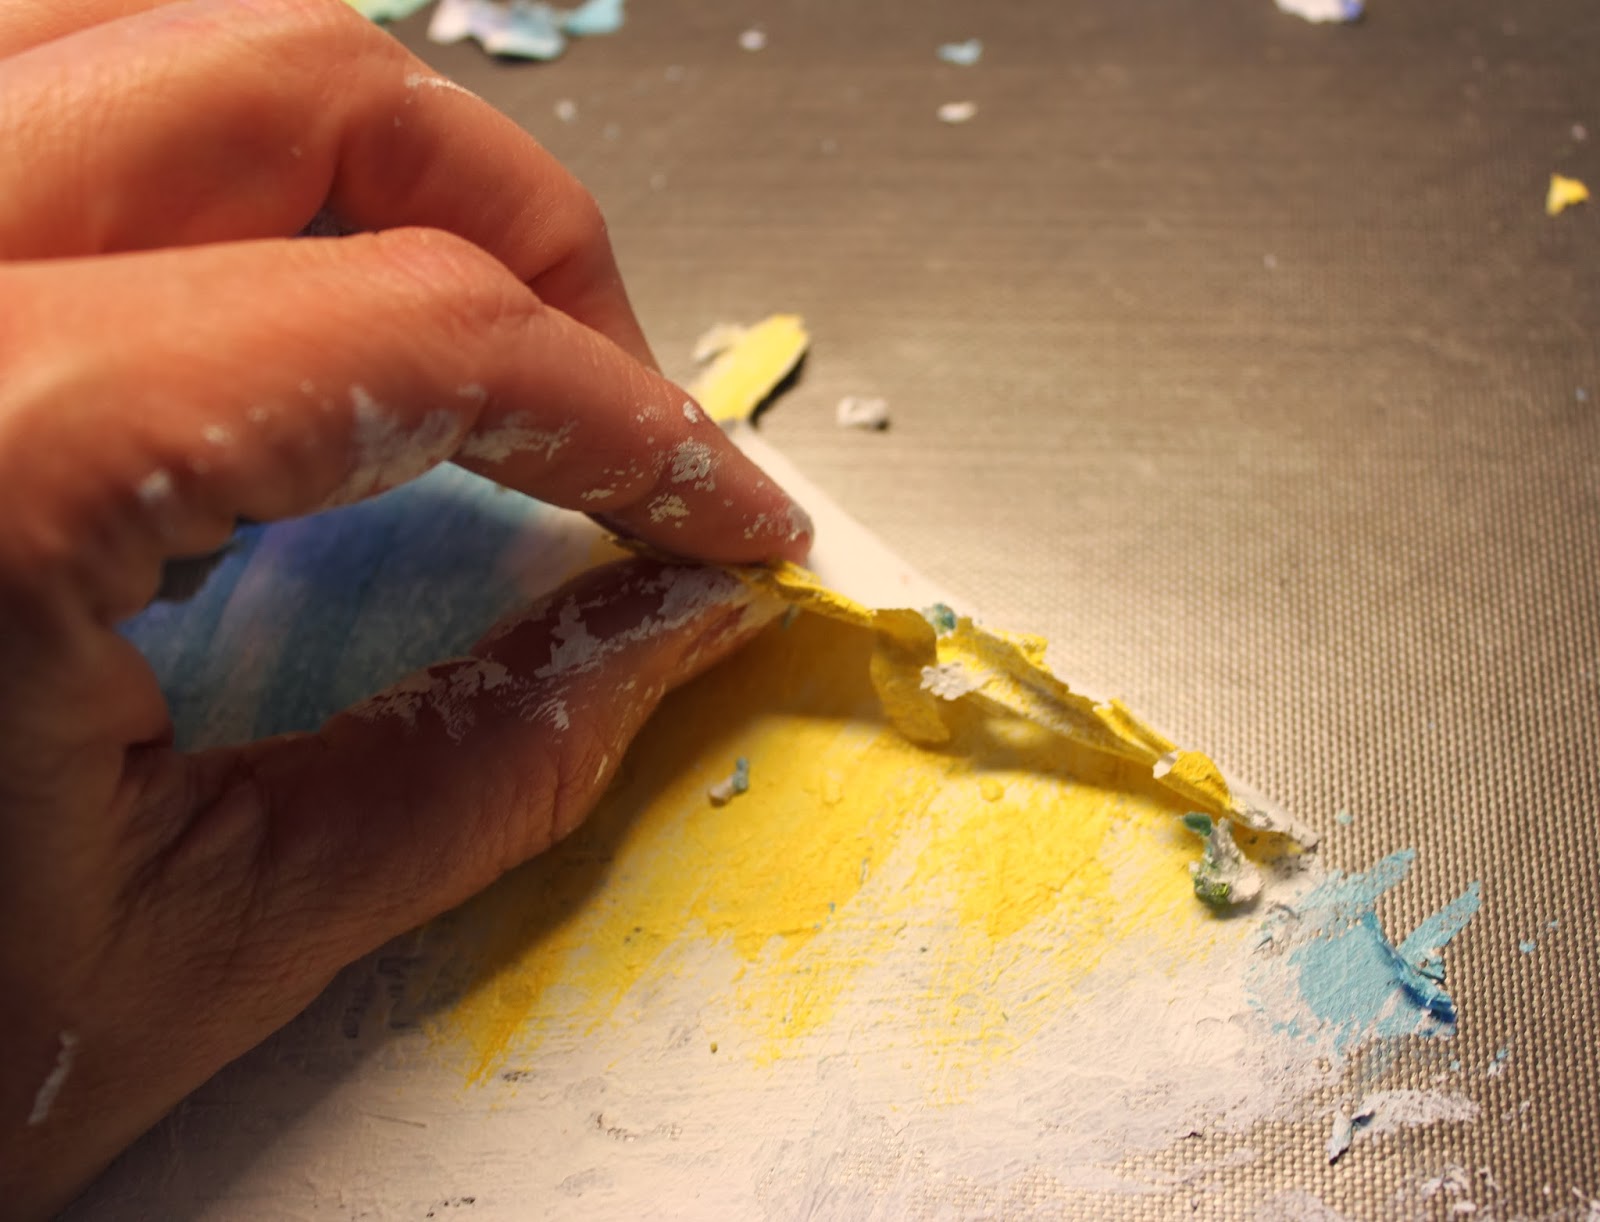
As I went to scrape the dried and partially dried gesso off, I thought, "Hey. This would be cool if I could use it."
So, I did.

As you can see, my "non-stick craft sheet", aka Teflon oven liner, was covered with gesso.


I made sure it was completely dry. Some of the thicker areas needed to be coaxed with my heat gun.


Then, I decided to color it with some Distress Paints and Distress Stain. 


I played with a little color mixing as well. Distress Paints are permanent when they're dry, so I made sure to mix them while wet.


I wanted to keep my peeling colors separated, so I ran my credit card on the sheet to divide them.


I scraped the gesso by pulling away at the edge. This way, it kept the peelings small.


Then, I pulled the thick parts up in sheets.


Here it is decopaged onto a book page which I will be using in a junk journal.


Close-up


Then I thought, "Why not stamp it before I pull it up?"
So, I did. 
This was stamped with Staz-On, because I knew I'd be using Mod Podge to adhere it to the book page, so the ink had to be permanent as well, otherwise it would smear.


Here's some blue and white stamped with dots.


Some more peelings.


Blue dots, decoupaged to another book page.


The texture and color variations are fun.


Tone on tone-ish.


And, here is my baggie of peelings, ready for another project.


Of course, I had to experiment with some more stamps. Here's my favorite crackle stamp.


I'll be sure to post more pics when I finish my journals. 
Thanks for reading!
Fondly, Tami

Friday, October 25, 2013

New Handmade Christmas Cards

So, I've been quite busy in the Craft Room. I have a blast making cards, but boy, do I ever OBSESS over them! Every card has to be perfect!
Yesterday and today, I made some Christmas cards.

"Making a List", made with a hand painted canvas flower with a Christmas jingle bell, grungeboard with white crackle paint, vintage buttons, lace, and ribbon.


Close-up of buttons.


"Merry and Bright", also made with vintage lace, buttons, canvas flower, and some brads.


"Peace on Earth", with a cute vintage rhinestone button punctuating the canvas flower.


And, a "Very Merry", also made with vintage buttons, a bead pick, and pearl accents.


Thanks for looking!
And, they are available in my Etsy shop if you're interested in handing out some beautiful handmade cards this season.
Fondly, Tami
I'm linking to:
Saavy Southern Style


Sunday, October 20, 2013

Applying Vinyl Wall Words

Hey, Peeps. I'm here today to answer that age-old question, "How do I apply my vinyl decorations to my walls?"
Vinyl is so hot in the home decor market right now. I LOVE decorating with vinyl because it looks like you've painstakingly painted it on your walls (or mirrors...or furniture...or doors...etc.). The other very cool thing is that when you get tired of it, you just peel it off. It's generally inexpensive, so you get a lot of bang for your buck.

Here's how to get started.
My vinyl comes with transfer tape already applied. When you receive it, take a firm card like a credit card. Here, I used my Pampered Chef scraper. Scrape from the center out. You don't want your transfer tape to bunch up and scrape your lettering or design.


Carefully and slowly, lay the design on a flat surface and pull the transfer tape off of the front. 


Keep the design flat and SLOWLY peel.


Line up your center marks on your wall. I often just put a little pencil dot on the wall, top and bottom (so it's straight) where I want my center to be. 


Press the top and bottom in the center, making sure that they're lined up correctly. At this point, you don't want to press your design on your wall. If it's not lined up, lift up the bottom of the transfer tape and re-apply it.


Check to make sure it's straight (did I make my point?).


Now it's time to smooth it out gently on your wall. Use the scraper to gently press the top of the transfer tape.


Pull the transfer tape gently at a sharp angle. If the design sticks to the tape, roll the tape back onto the design, burnish gently on the wall, and start pulling the tape off again.


 Keep pulling slowly. You don't want to rush the process.


Keep pulling at an angle, resisting the urge to speed up the process.


See these little registration triangles? They really aren't a part of the design. Go ahead and peel them off. 


And, voila! You're left with a beautiful design that looks hand-painted. And, when you get tired of it, just peel it off of your wall. 


Please note that wall words and vinyl designs should only be used on cured surfaces, so if you've recently painted (within the last month), don't apply them until you know your walls can take it. I have vinyl all over my house, and I love it. 
And, if you like this design, you can find it in my Etsy shop. I can also do custom orders!
Fondly, Tami