Wednesday, October 22, 2014

Gelli® Blog Hop and Stencil Giveaway!


Hey, Peeps. I'm so excited to be a part of this wonderful Gelli® Print Blog Hop. Thanks to Michelle Reynolds for the thought and execution! You rock!

So, I was trying to think of what I could do that hasn't been done. I actually did a different project- more of a mixed media assemblage- but I wasn't quite sure what I wanted to do. So, being the true artist that I am, I abandoned that project half-way through and started something else. NO JUDGING!!!

And, I did have some forethought, so I started out with a lovely, sturdy mixed media paper. This is probably my fave to work with. 


I wanted to play with something different. This is some inexpensive gouache. 


A little dab'll do ya.


Gouache spreads differently on the plate than acrylic. I used a brayer, just as you use with acrylic paint.


As you can see, it leaves a much different, non-uniform look compared to acrylic paint. I kinda like it.


I also painted some yellow circles with gouache. I forgot to take an after pic of the print, but you'll see it later. 


I also spread some red on with a credit card, just to see how it spread differently.


Here, I used my Sticked Hearts stencil.


You can see the yellow circles layered on the grey here.


I put the wet, red stencil on my waste paper and wiped it through the stencil with a baby wipe.


Here's the result. Like many Gelli® prints, the "waste" or "ghost" prints are often the most interesting.


I decided to re-position my heart stencil, and outline with my Stabilo black pencil, just for a different look. 


I tried to smear the pencil (which is water soluble) with my water brush, but I had forgotten that I hadn't prepared my surface with gesso, which would have made the stabilo pencil mark smear better. Oh, well. I just discovered another technique, aka mistake.


Then I switched to acrylic paint for no particular reason.


Here, I used my Iron Gate stencil.


I stamped through the stencil before I printed. This works more effectively with an "open" stencil (aka not detailed), and with a darker paint than I used. I'M NOT PERFECT, PEEPS!


Here's the ghost leftovers on the plate.


And then I moved on to grey and yellow- my two new fave colors.


I printed using my Crowned Stencil.


And here's the print.


And the ghost print.


Next, I used my Faith Stencil. This is one of my faves since there's so much texture going on.
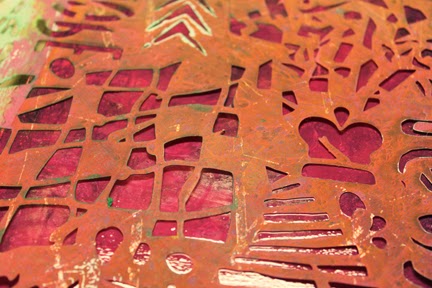

And, the print.


And, you always need to add a few hand-carved stamps. If you want to know more about making these, you can check my blog post here and my Pinterest board here.


Don't forget that for a different look, you can roll your stamps instead of just pressing them.


And then, there's nothing like a little splattering. I like using my fan brush with some watered down paint.


And, here's a print with some splatters.


And, there's nothing like some good ol' fashioned stenciling. Here, I used my Grunge number tag stencil and some blue paint for a little punch...


...and my Scruffy Crosses tag stencil.


Just some doodling with a NeocolorII crayon (water soluble)


And I think I'm ready to move on to the book.
You know these wonderful little coffee cup thingies? Well, they're going to become a cute little book.


I loved this particular one because of the dimpled texture. I tore it apart at the ends (it was conveniently serrated for me already). Then I applied gesso to the front and back of each piece.


I dried the gesso, watered down some paint, and brushed it on each side.


I wiped off some of the paint with a baby wipe, then I traced one side on the backs of my prints.


I cut out the shapes, slightly smaller than the coffee cozy.


Here are some "pages".


I eyeballed where I wanted my rings to be to bind the book.


Then I punched holes and inserted eyelets with my Cropodile. I did this just to the front and back pieces.


To emphasize the texture, I brushed on a little distress paint.


Since the backs of each page were white, I just applied some distress stain. I didn't want to have both sides of each page Gelli® printed because I wanted to leave room for journal entries or writing.


And, here are some of the spreads.


Of course, I had to junk the cover up a little, so I added a flower, some vintage buttons and beads, some pearl accents, and some burlap.


And, a little ribbon and a few more strung out beads.


And here's the final book.


And, just when you thought you've had all the fun you could have, there's more!
Just for visiting my blog, I am giving away THREE of the following 6" stencils from my Etsy shop


All you need to do is leave a comment about what you like about this tutorial or about the Gelli® Plate. 
On Oct. 26 at 8PM (EST), I will yell into the other room, "HONEY! PICK A NUMBER BETWEEN _ AND _, and he will pick the winner. Yups, that's how I roll.

And, if you like my stencil designs, feel free to check out LOTS more in my Etsy shop here.

I hope you enjoyed this picture laden tutorial. Thanks for looking. And, if you haven't checked out all of the other blogs, I have them listed below. Happy printing!


Wednesday 15th Oct Michelle Reynolds http://shellsinthebush.blogspot.com.au/Thursday 16th Oct Joanna Grant http://joannabananadesignoriginals.blogspot.comFriday 17th Oct Jacques Williamos http://theelevatorpress.wordpress.com/Saturday 18th Oct Linda Stokes http://www.lindastokes-textileartist.com/Sunday 19th Oct Phillippa Montier http://pipart71.weebly.comMonday 20th Oct Lauri Crowe http://www.laurijeancrowe.comTuesday 21st Oct Gail Schmidt http://www.shabbycottagestudio.netWednesday 22nd Oct Tami Sturm Howse http://www.thisandthatfromtami.blogspot.com

Friday, September 19, 2014

Another Junk Journal- OOAK

Hey, Peeps. I thought I'd share another junk journal that I have listed in the shop. This one was lots of fun, using many different techniques.

I think stuff is what stuff is made of. Gotta have stuff.


Hand stamped and doodled swirl.


Hand painted motif with gouache and some vintage lace.


Lots of texture, gesso, and some micro beads.


Tags, beads, ribbon.


Embossed crowns, keys.


Pan pastels on canvas with some lovely glitter.


STUFF!


Cute clips.


Embossed leather medallions and vintage lace.


Glittered leather cutouts.


Hand sewing.


Layers! 


Music notes with molding paste.


Cuteness!


Lots of texture.


Vintage labels and dress pattern paper.


Enamel heart, embellished with a vintage hankie.


And, that's today's installment of my latest junk journal. Feel free to visit in in my Etsy shop here.
And, as always, thanks for stopping by!
Fondly, Tami

I'm linking to Funky Junk Funky Jink Interiors

Wednesday, September 17, 2014

And the winner is....

kay whelpley-terry! Congrats, Kay! I absolutely love giving stencils away. Stay tuned for a very special giveaway in the near future!

And, here's something I'm working on....


Stay tuned....
Fondly, Tami

Wednesday, September 10, 2014

Time for Another Stencil Giveaway!

Hey, Peeps. I'm feeling like it's time for another giveaway. I'm giving away FOUR tag stencils. These stencils are perfect for scrapbooks, cards, mixed media projects, etc., and they have a convenient hole to use with a book ring, making them great for weekend crops. Visit my Etsy shop here and then leave me a comment telling me which FOUR you would like to win. I'll "draw a name" (meaning, I will yell to my husband in the next room, "HEY HONEY, PICK A NUMBER BETWEEN _ AND _!") by Sun., 9/14/14 at 8 PM EST. 

Here are some samples of my tag designs:


Good luck, Everyone!
Fondly, Tami

Sunday, September 7, 2014

Gelli® Print Transfers! Cute, Cute Candles!


Hey, Peeps. I can't believe how life gets in the way of blogging! Sheesh!
The creative juices were flowing and I thought of this project, which is WAY too fun. 
You know how you have all of those fun Gelli® prints and you look for different ways to use them?
Well, here's a very fun, versatile, creative, and interesting way to use them once more.
Gelli® print transfers on candles.
Yups. Use your Gelli® prints in your home decor.

And, here's a tip for you, Peeps. You DO ALWAYS scan your prints into your computer before you cut them up, don't you? If not, YOU SHOULD! Especially if it's a print that you absolutely love. Then it will be immortalized FOREVER!

Here's a fun print. I painted on my plate, did some Gelli® printing, and embellished it with hand doodles and my hand carved stamps. I printed onto a copy of a deed from my Grandparents' farm from the 1800's. And, do you remember these skins? You may recognize them.
So, I loved this print and wanted to use in something other than my art journal. 


I took some tissue paper and secured it to a piece of printer paper.


I used my glue glider on the edges and folded the tissue paper over to the back. It's important to make sure the glue is covered totally with the tissue paper, or the paper could stick in your printer and jam it. I hate it when that happens. 
The most important area to secure is the part that first feeds into your printer. Everything else should just follow after that.


Make sure you know how your paper feeds through your printer so that you're printing on the correct side. 
I have a scanner as well, so I can put my Gelli® print on the scanner and just copy it from there. 
This is how it looked when it came out. There are some wrinkles, but that's OK since they'll work themselves out.


I use this technique on battery operated candles, only. I'm a little weird about putting paper on a candle with an open flame. I know that the battery operated candles will be safe. That's just how I roll.


Remove the tissue paper from the printer paper. Since it was secured in the back, I cut the tissue off the printer paper around the edges.
I rolled the candle onto the tissue paper to do a rough measurement.


When I encircled the candle, I folded the edge back to establish a cut line. You don't want this to overlap. 


 I cut off the excess.


 Then I pinned the edges securely.


This next step is facilitated better with a heat gun, although you can use a hair dryer if you'd like. A heat gun is more efficient and will take less time. 
So, you know how if you hold a heat source to a candle, it burns and melts until there's nothing left. Well, let's just say you don't want to do that. Remember that wax is FLAMMABLE (which is kind of the point when you light one), but in this case, you don't want your candle to melt to nothingness.
Take your heat tool and start in the center of the candle (on the opposite side of the seam).


 Start in one spot. Keep the heat tool a few inches from the candle, making sure that you're not heating your fingers. When you see the candle start to glisten and the tissue paper melting into the wax, move along to the next spot, working your way around to the back seam. If you develop bumpy areas, just smooth them out with your fingers (but make sure the wax isn't HOT). When you get to the seam, go back to the center and work your way around the other side. 


If you have an edge on the top, just trim it with scissors and heat it into the wax. 
And, VOILA! You have a super cute candle that's a one-of-a-kind (OOAK- I just found that out) piece of home decor. Think of the possibilities! Christmas, Fall, Halloween, Valentine's Day, Fourth of July, WEDDINGS!!! The possibilities are endless!


And, for some super extra cuteness, I tied it with a piece of twine.


And, if you particularly like this Gelli® print, it's available as a digital image in my Etsy shop here
And, if you enjoyed this tute, please let me know. 
And, just for fun, check out my Stencil Giveaway here to enter!
Have a Super Gelli® Day!
Fondly, Tami

I'm linking to Unruly Paper Arts