Tuesday, July 30, 2013

Shabby Chic Junk Journal

So, I've been having a great time making items for my Etsy shop. I LOVE creating things, but what makes them even more special is creating them for other people, whether they're used as gifts or retail items. Here's my latest:


I'm a true fan of white on white-ish. This made me smile.


The heart medallion is melted UTEE, the flower is stamped, and the key is rubbed with white gesso. Gotta love gesso.

The elderly woman is an old picture (transferred onto the page) of my great great grandma, Ma Kelly, who lived to be 103 yrs. old. Little did she know she'd end up on Etsy.


I used a wide variety of techniques in this shabby chic book. Way, way too much fun.


It was made from a vintage Do-It-Yourself encyclopedia.


I fashioned a tag with a pocket.


The book included clips, crinkle ribbon, hand-painted papers, glitter, modeling paste, glass bead gel, stamped images, etc., etc., etc. It was hard to know when to stop.


Lots of texture.


Vintage buttons.


Pearl pens, corrogated cardboard.


Clips


Altered chipboard elements


Printed canvas and hand-painted papers


Stamped images, embossing powders, rhinestones, vintage measuring tape


Twine, distress paint


Distress glitter


More embossing, crinkle ribbon, and my signature Howsewears key image


Printed canvas back


I hope you enjoyed the "tour" of my book. 
Fondly,Tami


Thursday, July 25, 2013

New Technique for Mixed Media

Hey, Froggers. I'm on a roll. I've been working on some things for my Etsy shop and I'm having loads of fun.
So, I think I came up with a new technique. Perhaps it has been done before, but since I didn't know about it, I'll pretend it was my idea.
I pulled out some Antique Linen crackle paint, which I bought at a yard sale. I have no idea how old it was when I bought it, and I discovered today that it was very dry and very pasty. Getting ready to throw it out, I realized that as a mixed media artist, one should ALWAYS question items that are going in the trash can. I mean, really? Some of my more exciting embellishments or texture plates have almost ended in the trash can. For instance, this:


Most people would see this as trash, but as you mixed media artists know, this is a *Valuable* fruit tray. And actually, it makes a great pattern for a Gelli print.
So, I scraped off some paste from my brush.


 Then I tapped it onto a chipboard key. I really wanted texture, so I tapped instead of spread. It's just how I do things.


Then I use some blending foam and tapped some Vintage Photo Distress Ink on top after it dried.


A little spritzing with water ensued, and then a little rubbing with a slightly damp cloth.


There you go, Peeps. Instant stucco. Loving the texture.

It's going into a shabby junk journal that will soon be listed in my Etsy shop.
Thanks for reading!
Fondly, Taim

Wednesday, July 24, 2013

Etsy shop

Hey, Froggers. I'm working on my new Etsy shop. I will have a variety of handmade items, and perhaps some vintage items if I can part with them!
Years ago, my Grandma gave me some "old magazines". I looked at them and gasped. They were old Life magazines from the 1930's and 1940's. Since they had been in her barn for several years, they were rather dusty, and some of the covers were slightly tattered, but all in all, they were in good shape. I love the ads and articles, many about being frugal, since after all, it was wartime. Since the magazine pages were still in good shape, but the actual magazines were somewhat falling apart, I decided to upcycle them, and this is what I made.


I made coasters from ceramic tiles. I really try to capture the excellent images and vintage quality from these old pages. I have a set in my living room, and they're always a topic of conversation. Of course, no two are alike, which makes them really unique.


Here's the second set of four.


They are now available in my Etsy shop- http://www.etsy.com/shop/Howsewears
Stay tuned for more goodies!
Fondly, Tami

Saturday, April 27, 2013

More Gelli Plate® Fun

Hey, Froggers! I've had a little bit of time to play lately, and I mean a little. My back problems keep me from sitting for an extended period of time, so I'm eeking in what I can. I've had loads of fun designing more stencils, and hopefully in the near future, I'll be selling them on Etsy.

This is my key stencil that I just cut out on a manila folder. I love the way it turned out. These keys are my original designs, and when I created them, it was the first time I felt like an "artist".
And, this stencil design (made of durable stencil plastic and not manila folders!) is available in my Etsy shop here.


Here's the first print. Again, I used a manila folder from a stack that I was going to throw out, until I realized that that would be a big mistake!
When I used the stencil on the Gelli Plate for the first time, it stuck a little too much to the plate, so after I took it off, I covered it with clear gesso. I haven't used it since, so I'll let you know how the next printing fares.


Here's the second print. I had covered the original black on the plate with white paint, and this is what I got. I think I put on a little too much white paint, but that's the fun of Gelli printing. You just don't really know what you're going to get.


And here's the last print, or "ghost print". As usual, this is my favorite print.


And, here are some stencils I plan on playing with in the future.


Stay tuned! Fondly, Tami


Tuesday, April 2, 2013

Playing With the Gelli Plate®

So, I've been playing with the Gelli Plate. If you haven't heard about it, then you may have had your head in the sand. Just kidding! It's really a hot ticket item in our ever growing mixed media world.
I initially made my own, because I just didn't want to invest the money in something that was going to be a passing fancy (remembering all of the silk thread embroidery, polymer clay, sewing projects, and pillows-waiting-to-be-covered in my basement), but I soon realized that I needed something a little more stable and predictable.
So, I invested in the 8 by 10 Gelli Plate. And boy, is it ever fun.

Here is my French manicure before playing. And before you judge me, I have NEVER had a professional manicure before. I have always done my own. I sure hope HubbyDoc knows how much money I've saved, doing my own manicures.


Here's one using bubble wrap, my own custom dot stencil, blank circles as a mask, and a rosette stamp after it was all dry.


Here's a ghost print that turned out very soft and subtle, which I really like.


I stamped my medallion stamp on the paint before I printed it on scrap paper.


This one was made with my custom circle and number stencils. I'm addicted to designing stencils and masks for my mixed media. 


This one was just made from cleaning off my brayer, and using circles as a mask.


Another "clean the brayer" colorblock.


Cleaning the brayer again, with a stamp after it was dry. I love using my stack of old papers to add visual texture. This was a science project my homeschooled daughter did. 


Circles and hearts as masks.


And you know all of those border punches that you keep forgetting to use...?


Here's a print with hearts as masks.


Using border punches print over a color block print.


Ghost print with border punch papers and heart masks over colorblock. 


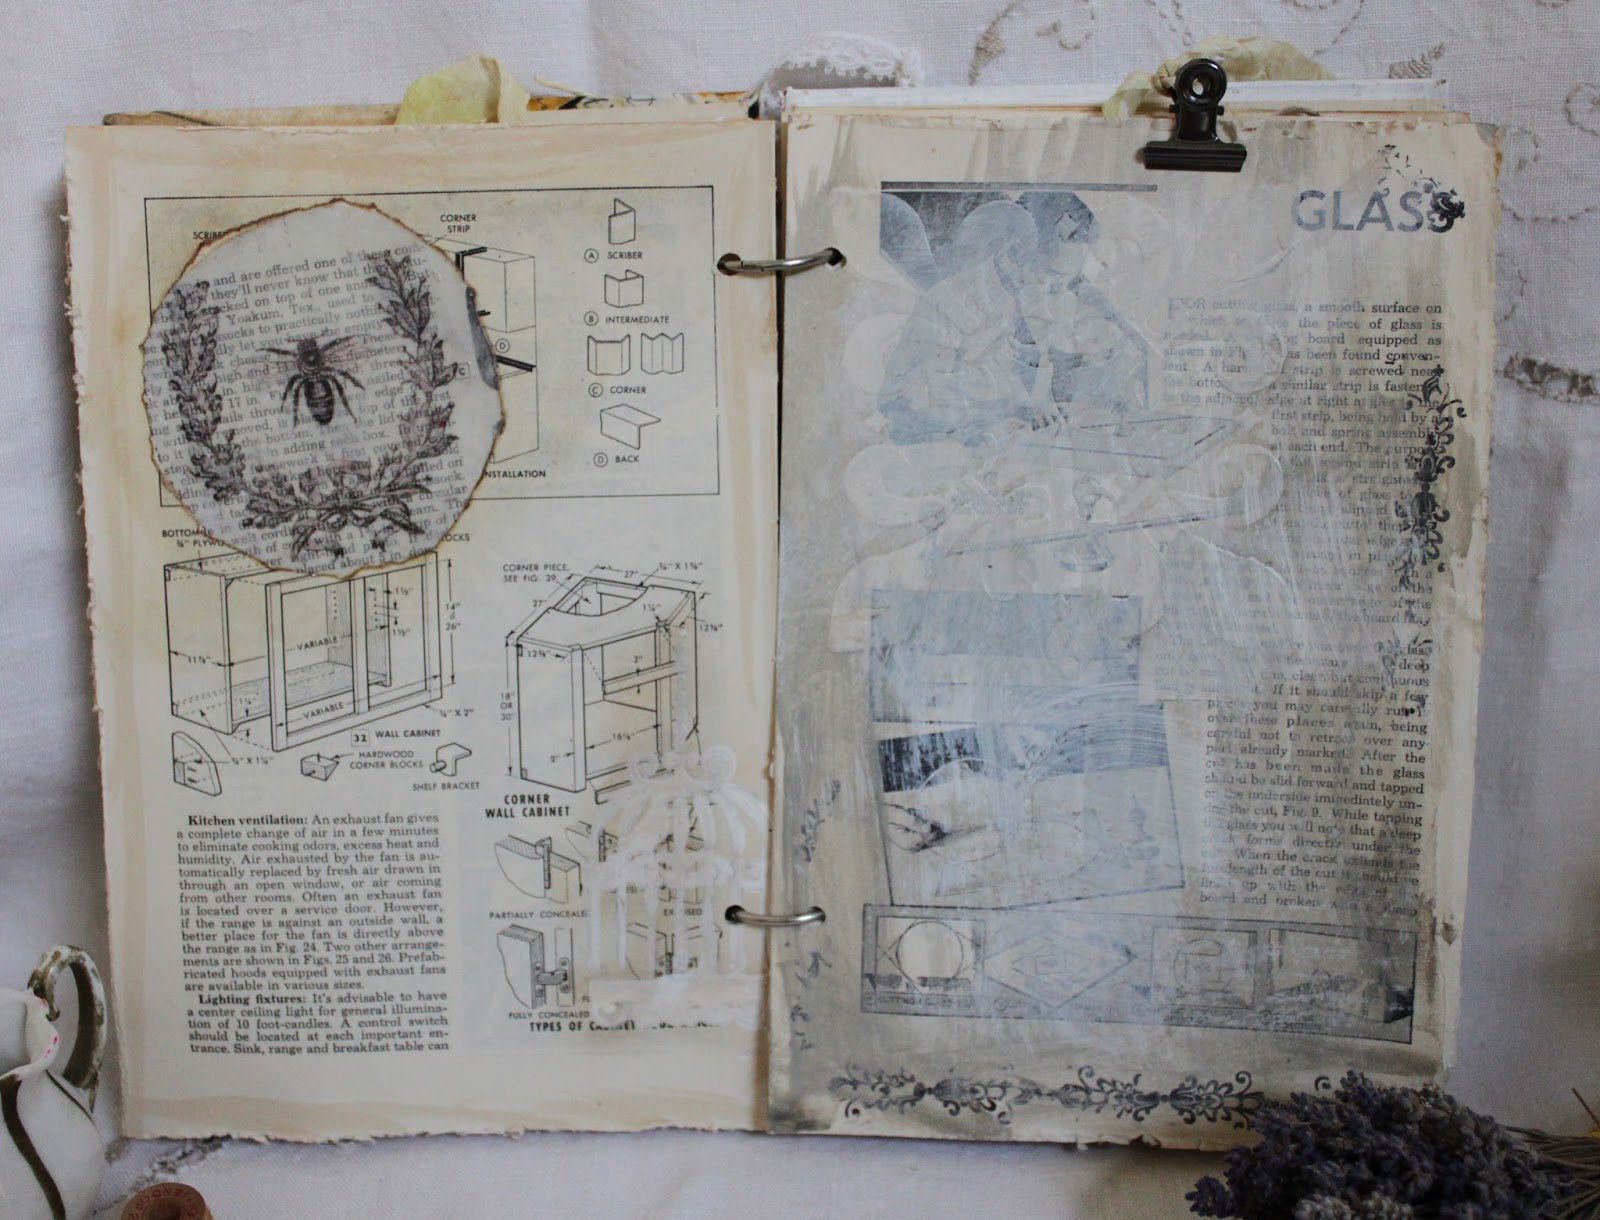
Using bird cage die cuts as masks.


Ghost print using border punch strips. This is going to be the base for something else, but I like it so much, I might just stamp it, or use one of my custom stencils on it.


This is one of my faves. I used a dabber first, a foam heart stamp, and a heart stamp that I cut out from a flip-flop. 


All of these paints are from samples of Pratt and Lambert paint, which my local hardware store was phasing out. I've had these paints for two years, and I've not opened most of them. They were great to work with, but some of them, even unopened, were drying up to a modeling paste consistency. However, I was excited, because now I had instant modeling paste! Here's and example of how I used it.


And here's a better view of the dimension. I love it.


And, here's a look at the French manicure after all was said and done. Guess it's time to get the nail polish remover out. ;)


I hope you enjoyed this little tour of my Gelli Plate printing.
Fondly, Tami


Friday, February 8, 2013

Another mixed media project

Here's another little mixed media project I finished the other day. I'm sorry I don't have more/better pics. I quickly took this when I set it up for sale at my Howsewears shop at Building Character. It was taken with my cell phone, but I hope to use my "real camera" and post some more so you can see the cool features like the texture and color.


The very cool thing about this project is that I discovered a new use for thickened Ranger crackle paint. It was too thick to use on cards, but it was great to use as a makeshift molding paste. I just used a heart stencil that was actually cut out of cereal box material with my Black Cat Cougar, so it was thicker than the normal plastic stencil. Therefore, the "paste" was good and thick. It dried nice and "crackly. I then spread Stickles dry glitter on top while it was wet. More pics to come when I get down to my shop (unless it sells). ;)
Thanks for looking!
Fondly, Tami

Thursday, February 7, 2013

The Princess Dresser

A few weeks ago, I talked to a gal at one of my vendor shows who said she had a toy chest that she wanted to paint, but she was afraid. I do remember that feeling with my first piece. Taking that first plunge with the brush was a little scary, but once I did, I was absolutely hooked. I have so many pieces of furniture in my basement awaiting their transformation. I've had pieces for a year or more before I could decide which makeover would suit them best, but I have to say that I've always been pleased with the final outcome. 

Here's the Princess Dresser, aptly named because she required a lot of pampering.


She was really quite ugly, but as my mom always suggestion, I looked for the potential. I loved her hardware, turned feet, and cute little wheels.


And her mirror had a curvy shape and lovely details. So I bought her. I probably spent a little too much money for her, but it was one of those things where, if I walked away, I would have regretted it. Like the box of very cool sewing machine cabinet drawers that I passed up for $5. DRAT!


Her top had certainly seen better days.


And here she is. I painted her with Old White and Paris Grey chalk paint. I think she's just charming.


I really like the detail on her drawers...


...and her top.


She's my new favorite piece.

So, all this to say, don't be afraid to take the plunge and paint something today. 
And, to keep you accountable and honest, let me know what you're going to try.
Fondly, Tami

I haven't linked much lately, so I'm linking to the following: