Sunday, February 1, 2015

Clean Your Craft Mat With Skin Peelings- Part I

Hey, again, Froggers! I've been playing with skins again, taking them to a different level.
This is a great and very *artistic* way to clean your non-stick craft sheet. 
Start with a very painterly mat like this.


Drip some Liquitex Gel Medium onto your mat, making sure to cover all of your icky painted areas.


Spread out a "medium thickness". You can use a brush or an old key card or your fingers. Just make sure your layer is a fairly even thickness.


It should look really bad...like this.


And this.


This next step is very important. Dry the entire area with a craft dryer. Don't get too close to the medium or it might bubble.


Then start with your favorite craft stencils. I used my tag stencils. Using the stencils, paint on top of the dried gel medium.
Here, I used my Plain Circles tag stencil.


I think circles always add a little whimsy. 


Again, dry between layers of paint, unless of course, you want to mix them. In this case, I didn't want to do that.


And using my Chevron tag stencil...


...and my Data tag stencil...


...and my grungy Grater tag stencil...


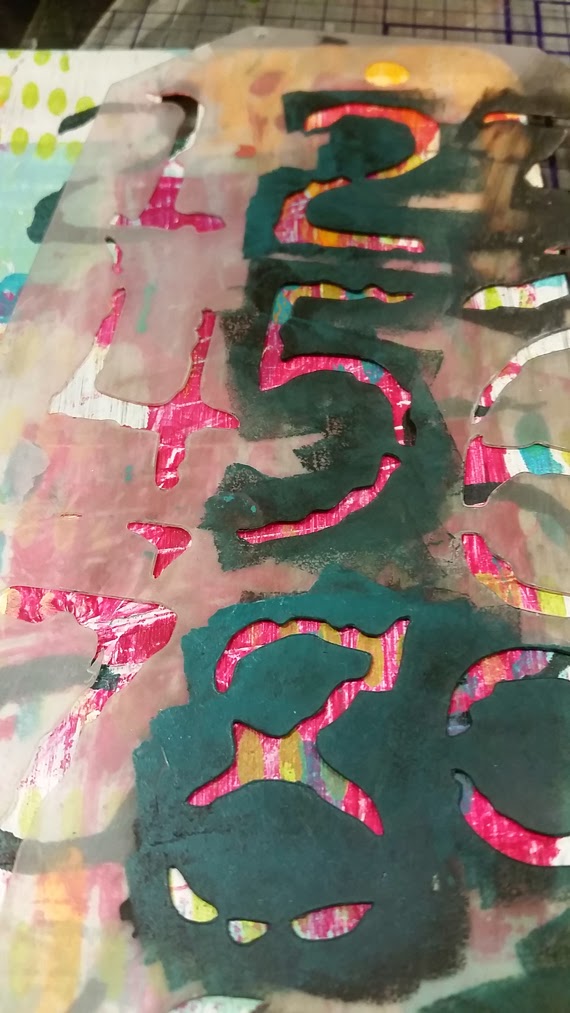
...and my Funky Numbers stencil...


...with layers and layers...


...and hand-painted elements...


 ...and doodles and outlines with PERMANENT markers (here I used a Sharpie marker, but ONLY after my paint was completely dried between layers)...


...and some more hand-painted doodles with highlights...


...and don't forget the hand-carved stamps. Remember to use PERMANENT ink. Here, I used black archival ink from Ranger.


I also took a credit card and just picked up some paint along the edge.


And made hash marks with the credit card.


And whatever you do, DON'T FORGET THE SPATTERS! I used my fan brush and watered down some black paint, and then I tapped my brush over my painted areas.


Spatters make the piece dynamic, giving lots of motion.


When you're happy with your design, spread a thick, even layer of gloss (or matte) extra heavy gel medium on top of the entire design.


I used a credit card to guide the medium on top. If some areas seemed too thin, I just went back with my finger and added more medium.


It should look good and white and thick like this.


If you'd like to add glitter, this is the time to add it. I sprinkled a little bit of glitter and fragments on top.


This is the hardest part of the whole process- waiting.
Yups. You have to wait for the gel medium to dry. I'm waiting overnight.
And, here's the cliff hanger, Froggers. 
You have to wait until tomorrow to see what happens next. Because it's drying as we speak.
Stay tuned. 
Fondly, Tami

P.S. If you are interested in any of my stencils or some of my hand-carved stamps, please feel free to visit my Etsy shop here.


Wednesday, January 21, 2015

Using Shoes to Make Cards

MAKE RESERVATIONS NOW! If you're like me, Valentine's Day often gets lost in the shuffle of real life. This year, I made reservations (yes, already) for a very nice restaurant for which I have a gift card. However, my sister called and said she and her husband will be in town that weekend. Oh, well. Perhaps I will make reservations for another time. Drat.
Anyway, here are a few cards I made for the occasion.

You see, I may or may not have cut up a red leather shoe to make some hearts. 
I had a great pair of Clark's sandals. I loved those shoes. However, when we moved 9 yrs. ago, the movers lost one shoe. I'm not sure how that happened, but it did. 
I waited and waited and waited for that other shoe to show up. It never did.
So, I had this wonderful red leather. 
"Why not cut it up?", I thought. 


So, I did. Here are the four hearts I cut. Dang, I would have loved that other shoe as well!


And, here are the cards. Not bad, eh?


I altered the hearts a little more by stamping with permanent ink.


Since these cards are so full of "stuff", I will reserve them for hand delivery. 
So, the next time you want to throw out a pair of shoes (or a handbag or a belt or a....), think twice!
Again, thanks for checking in.
Fondly, Tami


Tuesday, January 20, 2015

Mixed Media Laminate Sample- Project Two

Hey, Froggers (Friends that are Bloggers)! Here's Example Two of my laminate sample mixed media projects. In case you missed Project One, you can find it here. 

I can't wait to show you what I'm going to actually DO with them. 

So, some of you may wonder where to start. You sit at your table and you have no inspiration at all. You are surrounded by all of your fun supplies, and you're paralyzed. 

Well, it happens to me, too. Here's what I do.

First, I get out something small- and art journal page, a tag, the inside of a cereal box (one of my personal faves since it costs nothing) and in this case, a laminate sample that I got from my creative re-use shop.
I then get out paints that inspire me. Some days, I'm in a pink and blue mood, and then others, I'm in a red and green mood. And don't EVEN talk to me about the black and brown mood.

Then, depending on my substrate, I cover it with gesso. Well, 99% of the time I cover it with gesso. 

Then, I just randomly scrape some paint on my substrate with a credit card. Be free here, Peeps. This isn't rocket science and it won't kill you if you don't like it. You can always cover it up with more gesso and start all over. The goal is to play and have fun. 

Here, after my initial layers were painted on, then I just used my stencils. I started with my Grunge Numbers stencil and randomly dabbed on a few numbers.


Then, I got out my grungy Grater stencil and sponged on a little blue.


And my new fave, my Data stencil.


It's all about layers, Peeps! And, don't forget doodles and rubons and stamps! They really give the project some life and motion.

And of course, don't forget the cute embellies! Here, I took a leather sample, covered it with gesso, stamped it with permanent ink, sanded it, punched holes in it, and threaded it through a bought mini belt buckle. I attached it with a heavy gel medium. 
Then I just ran my vintage photo ink pad around the outside edge to frame the whole piece.


Hang a few keys and some metal stuff.


And, there you have it- a finished mixed media piece to hang to prop on a mini-easel. This would also make a great gift, but I think I will probably keep it.


So, get your paints out, pick something to paint, and DO it!
Let me know if you've been inspired. 
Fondly, Tami

I'm linking to Funky Junk Interiors


Monday, January 19, 2015

Mixed Media Laminate Sample- Project One

Hey again, Peeps. I just came home from a wonderful weekend of mixed media near my home town. We get together once a year, and it's so much fun. While I love the Craft Room here at home, it's nice to get away from the day-to-day demands that pull me from my crafting. If you haven't ever gone on a mixed media retreat, I'd highly suggest it.

I'm taking part in a wonderful course called Creative Jumpstart, which can be found here. This year, it is generously sponsored by Liquitex. The course includes short videos just about every day in Jan. and they're great.

So, back to this weekend. I had so much fun just PLAYING! I didn't have an agenda or a specific project. It was great to just explore different techniques.

I started with a laminate sample from my local creative re-use shop. Gosh, that place is filled with so many different substrates for painting and goo-ing up. It's about 5x7"- the perfect size to finish in a small amount of time.

I wanted to use mainly my own stencils, so here's how it looked.

I started with a base of gesso and paint, and then I used my Piano tag stencil. Since I'm a musician, this one is rather meaningful to me.


The came the Data tag stencil. This one gives some whimsy to mixed media, card, or scrapbook projects. 


Then came the Scruffy Crosses tag stencil. The tag stencils are my go-to supplies for retreat weekends since they're so portable and store easily with a book ring.


Then I took out the Mish Mash stencil. Again, this is one of my faves because there's so much going on in terms of texture and design.


Then, the arrows came out. Gotta love me some arrows.


And, don't forget a little doodling, rub-ons, and bling!


Again, thanks so much for checking out my blog!
I do feel a stencil giveaway around the corner!
Fondly, Tami

Wednesday, January 14, 2015

Seconds Stencil Sale!


Hey, again, Peeps. I once had a customer who asked me what I did with my stencils that didn't quite "make the cut". I instantly flashed back to all of the usable stencils in my craft room that weren't really perfect. You see, I'm extremely particular about the stencils that I send out to my Etsy customers. If my products aren't perfect, they end up in the Seconds pile. Sometimes I use them, but most of the time, they just sit in my bin, all lonely and stuff. They were perfectly useful. They just weren't perfect. I sold her a collection, and she loved them. 

So, I decided to sell my seconds in batches. When you order, you will receive a "surprise package". You won't know exactly what you're going to get, but that's half the fun. Your stencil package may include partial stencils, duplicate stencils (because I had forgotten that I already cut that particular design), stencils that were just slightly dented, ones that were used slightly with demonstrations, or those that were cut on "test plastic" (perfectly good plastic on which I tested my cuts). You will receive at least 5 stencils.

But, that's not all. Each package will include a brand, new, "yet-to-be-listed" tag stencil (valued at $5-6), as well as a few mixed media goodies (think vintage goodies like flash cards or card catalog cards, old lace, or some game cards). 

These Seconds Stencil packages will be available as I acquire them, so they'll be listed on a limited basis. 

If you'd like to be notified about my Second Stencil sales as they become available, as well as new design listings and other sales, please e-mail me to be put on my mailing list. I promise not to spam your inbox by sending out no more than 3-4 e-mails per month. 

So, feel free to check out my Etsy shop here.

Fondly, Tami